Home    About Me    Facebook    Recipes    Link Parties
Showing posts with label recipe. Show all posts

Thursday, September 5, 2013

Quick Yeast Bread - Review

Hi!

   It's been a long time since my last food related post, but I really wanted to share this with you. We recently moved to a new apartment and our new stove has a reliable oven in which we can bake bread. YAY! My partner and I used to have a toaster oven, but we never dared bake real bread because we were sure that the temperatures weren't accurate. So we were eager to try and after we searched the internet for quick and delicious yeast bread recipes we stumbled upon this one.

Quick Yeast Bread | Recipe here

   First thing! This bread is delicious, it has a very soft crumb that is very neutral in taste which means you can add as many ingredients as you like to make a bread that will suit your taste and your needs. Second! The crust is crispy, it gives the bread character and helps it withstand with much more dignity the process that converts it into french toasts. :P Third! It was fun and quick to make. You should try it too.

French toasts with fruit salad.

   We were so eager to try our bread that we whipped up the dish below; pasta marinara, corn on the cob, salad, avocado and our homemade bread, fresh out of the oven and spread with vegan butter. Yeah... We're trying vegan/vegetarian now, my partner has always been interested so we decided to give it a try.


   What have you been up to all this time?

Thursday, March 1, 2012

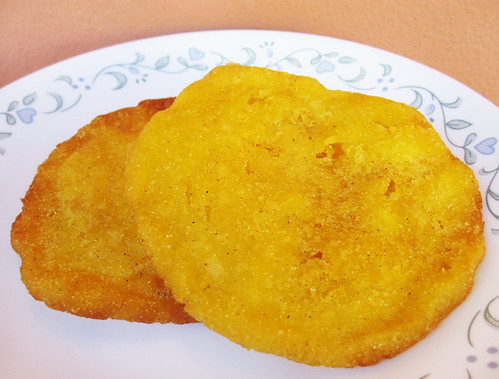
Arepas Venezolanas - Recipe

   Here is the long awaited recipe for my ultimate comfort food; Arepas Venezolanas. I guess most of you are wondering: What in the world is an arepa? So I set up to find a definition that would work for everyone around the globe.

Wikipedia says:
An arepa is a flat, round, unleavened patty made of cornmeal or flour which can be grilled, baked, boiled, or fried. The characteristics vary by color, flavor, size, thickness, garnishment, and the food with which it may be stuffed, depending on the region. It is a native sort of bread made of ground corn (or flour), water, and salt which is fried into a pancake-like bread. It can be topped or filled with meat, eggs, tomatoes, salad, cheese, shrimp, or fish.

   The story of how I stumbled upon this recipe has its origins a few weeks ago. I realized that I might be sensitive to gluten so I started to research about all the options a gluten-free diet might offer and I stumbled upon this site. The original recipe makes more arepas but I make a smaller batch because I'm also watching my carbs. I like to make them very thin, because they turn out super crispy but they are normally thicker which makes them crispy on the outside and soft on the inside. They can be made thick enough to work as a little bread bun that can be cut open and stuffed with whatever filling you crave. I love to eat them topped with cheddar cheese but any salty topping or filling would work.

Arepas Venezolanas - Recipe

Ingredients

**Makes 4 arepas

   -1/2 cup Masarepa (pre-cooked cornmeal)
   -1/8 tsp salt
   -1 tbsp of Splenda sweetener or sugar
   -1 cup boiling water
   -Oil for frying


Directions

  1. In a large bowl, mix together the cornmeal and salt. Pour in 3/4 cups of boiling water and mix to form a dough. Cover with a towel or plastic wrap and set aside to rest for 5 to 10 minutes.
  2. With wet hands, form a ball using 1/4 of the dough and press  on a piece of wax paper to form a cake about 4 inches wide and 1/2 inch thick. If the dough cracks at the edges, mix in a little more water and then form the cakes. Repeat, until all four arepas are formed.
  3. Heat the oil in a frying pan over medium-high heat. Fry the patties to form a light brown crust on one side, 5 to 6 minutes. Flip and brown on the other side.
  4. When all the patties have been fried, transfer them to a paper towel. Top and serve immediately.

Enjoy!

If you make them, please take a picture and share.  :D

Saturday, February 18, 2012

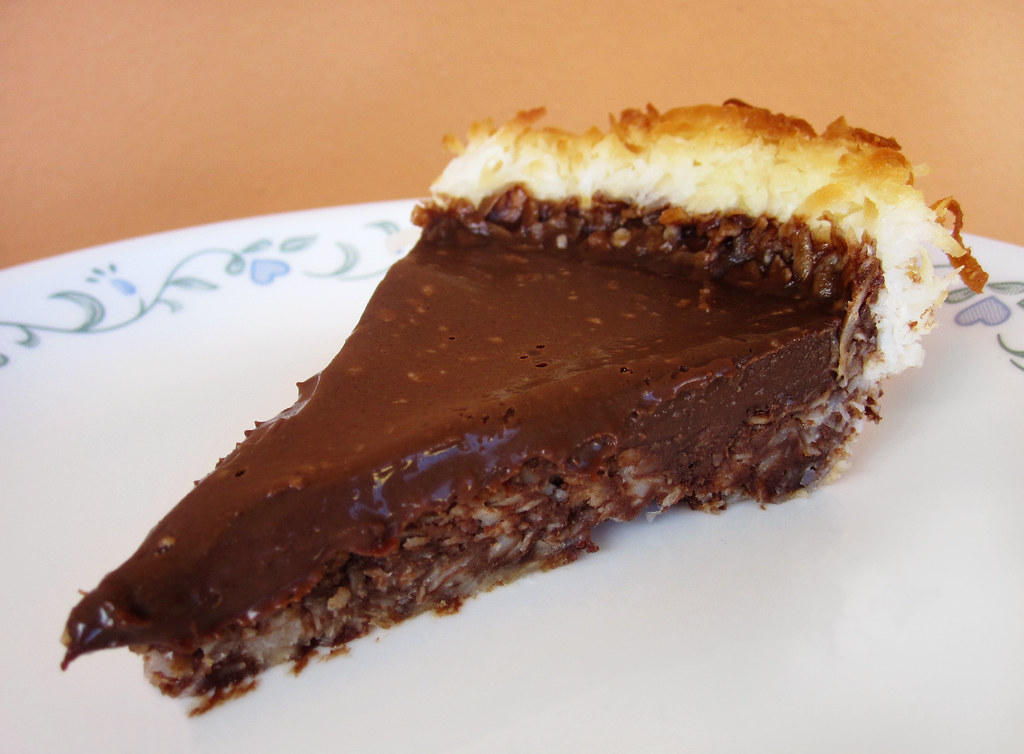
Chocolate Macaroon Pie - Review

Chocolate Macaroon Pie - Recipe
Chocolate Macaroon Pie | Recipe here

   Yay, food! It's been a few months since I last shared a recipe or recipe review here but a couple of weeks ago I was scrolling through my reader and saw this spectacular pie. I decided I'd make it because it used very few ingredients and seemed easy to make. I was right!

   It was part of a pie party that Monica from Lick The Bowl Good hosted for her family and friends. My love for chocolate said that there was no way I could go wrong with this pie. I made it and at first I thought it was a bit too much (I know... no such thing as too much chocolate) so I topped it with a dollop of vanilla ice cream and it was heaven. I definitely recommend it.

Saturday, November 5, 2011

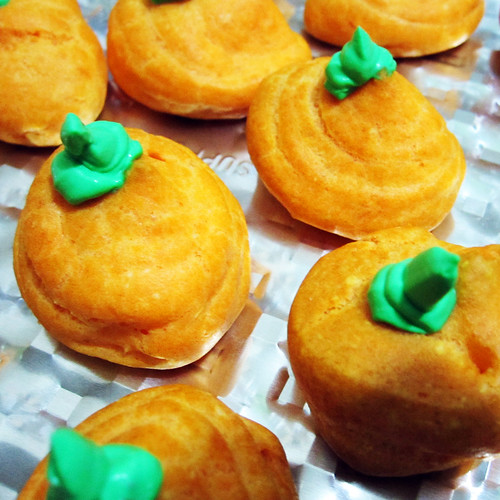
Zucche Misteriose (Mysterious Pumpkins) - Recipe

   This Halloween treat is a variation of a Cheese Puff video-recipe by GialloZafferano, a culinary channel in Youtube by Italian cook Sonia Peronaci. This recipe was part of their special Halloween lineup. I found this recipe the day before Miss Lou's Halloween party and decided that I had to make them. Then I made them in the middle of all the hurry with the costume and make-up for the party. I'm sure that if made with a little bit more of time you could create a gorgeous masterpiece.

Miss Lou's Halloween Party

   One fair warning: These are not sweet! That's the first impression most people (myself included) get. They are salty treats with a very strong cheese flavor that somehow remind me of Pepperidge Farm's Goldfish Crackers. The best part is that if you change the food colors you can make treats for any kind of holiday, or simply leave out the colors for a golden brown treat that could make its appearance any time of the year.

   There are several steps, but the recipe is very easy to follow. If you want to try it, I recommend you watch the video first to get a general idea of what you'll need to do. I translated the recipe and converted the measurements for your convenience but I did change some of the ingredients.

I strongly recommend them, they are to die for. :P

Miss Lou's Halloween Party

Ingredients

Cheese Puff
   -100ml water (3.4oz)
   -6 tbs flour
   -3 tbs butter
   -a pinch of salt
   -2 eggs
   -1/3 cup Parmesan cheese
   -red and yellow food coloring

Filling
   -4.25 oz can of deviled ham
   -8 oz cream cheese
   -1/3 cup Parmesan cheese

Garnish
   -4 tbs cream cheese
   -green food coloring

Directions
  1. In a small saucepan, bring the water,butter and salt to a boil.
  2. Add the flour and remove the saucepan from the heat.
  3. Mix vigorously until the ingredients are well incorporated.
  4. Return the saucepan to the stove and mix over low heat until a white residue appears on the bottom of the saucepan.
  5. Let the dough cool.
  6. Once the dough has cooled, add the eggs one at a time and mix well.
  7. Mix in the Parmesan cheese.
  8. Color the dough using red and yellow food coloring to obtain a bright orange color (I used approximately 23 drops of yellow and 4 of red McCormick food coloring).
  9. Fill a piping bag with the colored mixture and pipe small mounds (aprox. 1 inch each) of the mix onto a cookie sheet covered with parchment paper.
  10. Bake 15 minutes at 425F.
  11. After the first 15 minutes lower the temperature to 370F and bake for 10 more minutes.
  12. Turn of the oven and let the puffs cool with the door partially open.
  13. While the cheese puffs cool, mix the ingredients for the filling and transfer it to a piping bag.
  14. Once the cheese puffs have cooled, use the back of a spoon to make a small hole in the bottom of each.
  15. Fill the cheese puffs with the deviled ham mixture.
  16. Combine 4 tbs of cream cheese with enough green food coloring to obtain a bright green color.
  17. Fill a piping bag with the colored cream cheese and use it to garnish the cheese puffs.
  18. Store in the fridge before serving.
Enjoy!
If you have any question feel free to ask. Remember, if you make them, please share a picture. I'd love to see. :D

Thursday, October 6, 2011

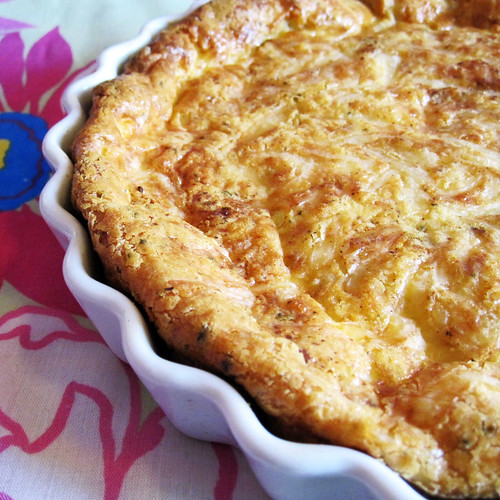
Crustless Quiche Lorraine - Recipe

   I remember when I blogged about this quiche pan as a garage sale find. I said I wanted to share with you a delicious quiche recipe that I loved. The thing is, health issues are pushing me to loose a lot of weight and I just started to count my carbs. Yes, I'm on Atkins and so far I've lost 8 lbs. I'm on the right track and very happy because this is the first diet that ever worked for me. But enough with the diet talk, I just wanted to explain why my quiche Lorraine doesn't have a crust. In this recipe I used chives instead of the green onions the original recipe called for. Enjoy!

Crustless Quiche


Ingredients

   -8 slices of bacon, cut into small pieces, around 1/2 inch
   -1 tablespoon finely chopped chives
   -2 cups shredded Swiss Cheese, divided
   -6 Eggs, beaten
   -1 cup heavy whipping cream
   -1/2 teaspoon salt
   -1/4 teaspoon pepper
   -1/4 teaspoon paprika or ground red pepper
   -1/8 teaspoon ground nutmeg


Directions

1. Preheat oven to 350 degrees F and grease quiche dish with butter.
2. Fry bacon and chives together until bacon is done.
3. Sprinkle cooked bacon and chives in the bottom of the greased quiche dish.
4. Top with 1 cup of the Swiss cheese.
5. In a bowl, stir together the beaten eggs, cream, salt, pepper, paprika, and 1/8 teaspoon nutmeg. Pour into the quiche dish; try not to dislodge the bacon.
6. Top with the remaining 1 cup of Swiss cheese. Sprinkle with nutmeg.
7. Bake at 350 degrees F. for 35 minutes or until set. Remove from oven and let stand 10 minutes before serving.

Original Source: http://homeschoolforms.com/cookbook/eggche/Quiche-Lorraine-bacon-no-crust.htm


Enjoy!

If you make it, please take a picture and share.  :D


------------------
Would you like to see other tasty treats? Visit Make Ahead Meals and  Chef in Training.

Wednesday, September 21, 2011

Low Quality Photos, High Quality Taste

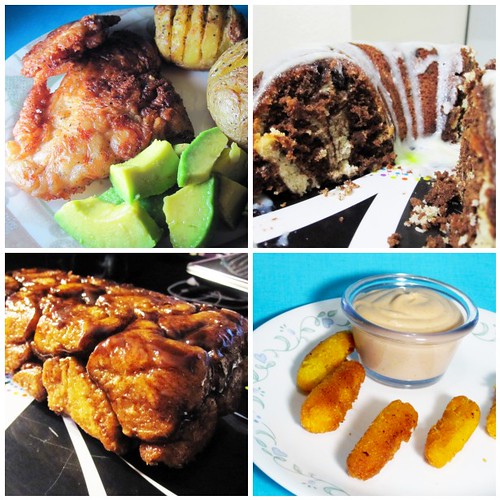
    In the past few weeks I've cooked many new recipes. The thing is, I'm a night owl, so most of the good food I make is long gone by dawn. The biggest downside of this fact is that I don't have the resources to take good pictures due to the lack of natural light. I sometimes take a couple of pictures with the best lighting I can get in order to document the existence of those dishes. I decided to share them with you because even though they don't look pretty in the pictures, I still think these foods were delicious.

Low Quality Photos, High Quality Taste

Clockwise:

  1. Breaded Chicken Breast with Hasselback Potatoes and Avocado.
  2. Marbled Bundt Cake
  3. Sorullitos de Maíz (Cornmeal Fritters) with MayoKetchup.
  4. Monkey Bread baked in a loaf pan. 
The links above point to the recipes that inspired me. You will notice that in most cases my finished results are very different from what the original cook did. Sometimes I make variations on purpose, but other times I'm forced to improvise because halfway through the recipe I notice that I'm missing some of the ingredients.

Monday, September 5, 2011

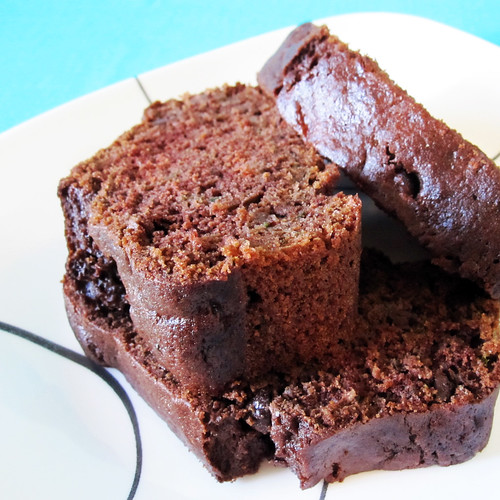
Double Chocolate Zucchini Cake - Review

   I made this delicious cake a couple of weeks ago and wanted to tell you about it. I won't show the recipe here because I used exactly the same recipe that JULIEVR posted on Babble's Family Kitchen. I just halved it because I didn't want to have 2 of these babies hanging around. I must tell you how dense, rich and moist this cake was, REALLY! This thing is scrumptious, very full of flavor and so dense that you could grab a slice and feel satisfied, but who said satisfaction was the goal? I just want to eat the whole cake myself. I recommend you try this, Oh! and don't tell your kids that there's one cup of vegetable in it.

Double Chocolate Zucchini Cake

   You're welcome!

Saturday, August 27, 2011

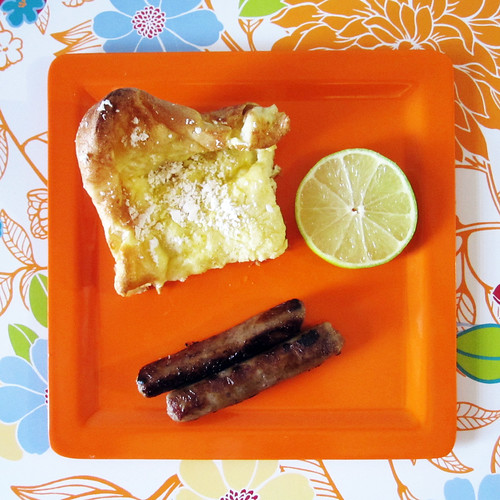
Delicious Dutch Baby - Recipe

   These last days we tried a few new recipes, one of them was the super yummy Dutch Baby that we found through Foodgawker on Sarah's Sweet and Savory Blog. Don't worry, we are not cannibals, that's just another name for German Pancake, a recipe originally made by German-Americans based in Seattle. This thing was so good and easy we had to make it the next day too. They say it is similar to Yorkshire Pudding but I've never tried that. I'd describe it as a lighter omelette, it's almost like preparing the batter for french toast and baking it on a pan without the bread. I think it's a little hard to explain its texture and taste. The only thing I know for sure is that this is a delicious food that is going to be making regular appearances on my breakfast from now on.

Dutch Baby

Ingredients

   -3 eggs
   -1/2 cup milk
   -1/2 cup flour
   -1/4 teaspoon salt
   -1 tablespoon butter

Topping - If desired

   -lemon
   -powdered sugar

Directions
  1. Preheat the oven to 425°F
  2. Add the butter to a 8x8 baking dish with at least 2" sides. Place into the oven. Once the butter has melted, remove the baking dish from the oven. Run butter all over the pan bottom and up the sides. Set aside.
  3. Beat eggs with a wire whip until well aerated. Add milk and whip again. Add salt and flour and stir with a fork, until just blended.
  4. Bake for 15 minutes or until the sides have peaked and browned.
  5. To serve, drizzle with lemon and powdered sugar. As an alternative you might top it with your favorite fruit or fruit preserves.
 Enjoy!
If you make it, please take a picture and share.

Tuesday, August 16, 2011

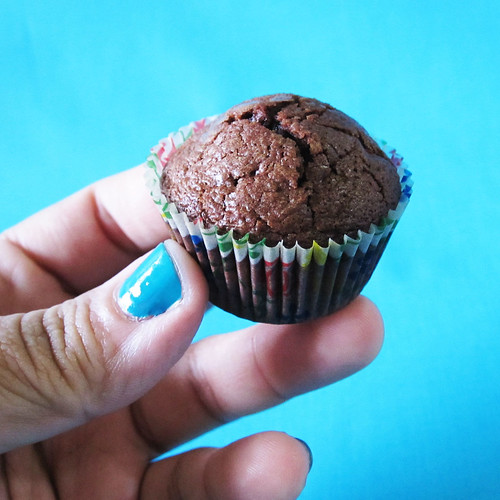
3 Ingredients Nutella Cuppy Cakes - Recipe

   I've been making more items for my shop update but you've seen many of those. Dessert is very necessary for me, so I have another dessert recipe that I discovered a few weeks ago. Nutella Cuppy Cakes, the original recipe calls for 1 more ingredient, that being chopped hazelnuts. We wanted soft texture, so we left those out. Also, the original recipe states that these are Nutella brownies, but they're not like brownies to me, the texture is more like moist cake. Don't get me wrong, these things are yummy and TOO easy to make. We have made them a few times and we never had to store any leftovers until last night. I saved one so I could take a picture and share it on the blog. The texture changed a lot, it wasn't that moist this morning, I'd say they were completely cake like. I think they are at their best when they're still warm from the oven.

3 Ingredients Nutella Cuppy Cakes


Ingredients:

   -1/2 cup Nutella spread
   -1 large egg
   -5 tablespoons all purpose flour

    Directions:
    1. Heat the oven to 350 degrees. Line a 12-cup mini muffin pan with paper or foil liners.
    2. Put the Nutella and egg in a medium bowl and whisk until smooth and well blended. Add the flour and whisk until blended.
    3. Spoon the batter into the prepared muffin tins (about 3/4 full).
    4. Bake until a pick comes out with wet, gooey crumbs, 11 to 12 minutes. Let them cool for at least 5 minutes. Serve immediately or cover and store at room temperature for up to 3 days.
    Enjoy!
    If you make them, please take a picture and share.

    Saturday, August 13, 2011

    Budae Jjigae Inspired Ramen

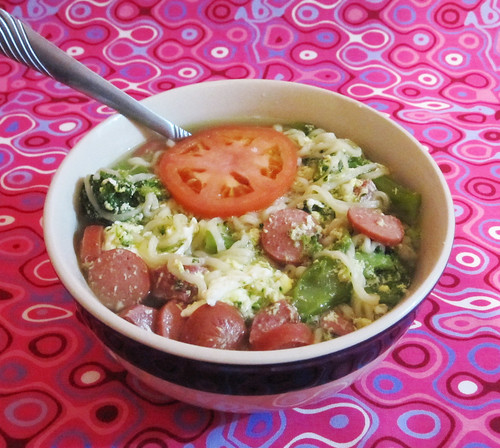
       I don't know about you, but I have a Tumblr account which I love. It's a place where people share what they like and if you have tastes in common you can follow them and see their posts on your dashboard. That's how I found budae jjigae, (Korean for army base stew) on an Asian food blog called Mochi Desu. They call it like that because after the Korean War meat was very scarce and they would use what was left in army bases, like canned ham, hot dog and SPAM. They added their own touch to the soup and that's how budae jjigae was born.

    Budae Jjigae

       We saw it and felt the need to make it because it looked easy and yummy. We added some western ingredients combined with the essentials of budae jjigae, to a normal ramen soup. It might not look pretty but it was delicious.

    Thursday, August 11, 2011

    Cream Cheese Rippled Banana Bread - Recipe

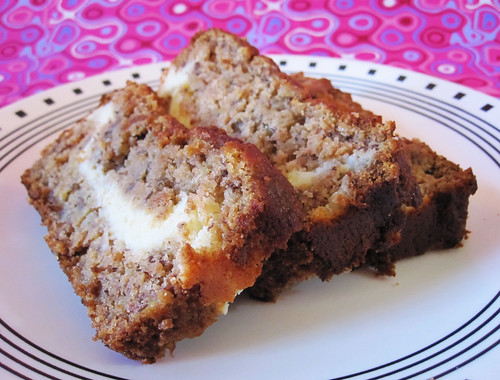
       At home there's always someone craving for dessert so we have turned into amateur bakers for the sake of health and economy. One of those desserts that appear often in our fridge is this AWESOME banana bread. This bread has been our friend for more than a year and has suffered many changes in the way. The most noticeable would be the cream cheese ripple which the original recipe didn't have; it was added in our most recent batch of the recipe. Another change would be some of the methods. Since we don't have any mixing equipment, we use our arm power to shake, mix, fluff and smooth everything out. This yummy bread can be served hot, fresh out of the oven, warm or cold from the fridge. After this last step it would turn into a delicious bread pudding texture and it can be stored in the fridge or freezer in case you have leftovers.

    Cream Cheese Rippled Banana Bread
     

    Ingredients:

        Cream Cheese Filling
        -4 ounces (114g) of cream cheese at room temperature
        -1/4 cup granulated white sugar
        -1 large egg
        -2 1/4 teaspoons all purpose flour

        Banana Bread
        -1/2 cup butter
        -1/2 cup unsweetened applesauce
        -3/4 cup white sugar
        -2 eggs, beaten'
        -1/2 teaspoon vanilla extract
        -1 cup all purpose flour
        -1 cup quick cooking oats
        -1 teaspoon baking soda
        -1/2 teaspoon salt
        -1/2 teaspoon ground cinnamon
        -1 1/2 cup ripe mashed bananas
        -1/4 cup milk

        Cinnamon Sugar Garnish
        -1 tablespoon granulated white sugar mixed with 1/2 tablespoon ground cinnamon
       

    Directions:

    1. Preheat oven to 350 degrees F (170 degrees C). Grease a 9x5 inch loaf pan. Sprinkle the bottom and sides of the pan with some of the cinnamon sugar garnish. Set aside.
    2. To prepare the cream cheese filling mix the cream cheese and the sugar until smooth and creamy. Add the egg, mixing until just incorporated. Stir in the flour. Set aside.
    3. Cream together the butter and the sugar. Add applesauce, eggs and vanilla. Beat until fluffy.
    4. In a large bowl, whisk together the flour, oatmeal, baking soda, salt and cinnamon.
    5. Add the wet ingredients, the bananas and the milk to the flour mixture. Mix until blended.
    6. Pour half the batter into the greased pan.
    7. Add the cream cheese filling and smooth using the back of a spoon.
    8. Add the rest of the batter and smooth it as before.
    9. Sprinkle the remaining cinnamon sugar garnish on top of the batter.
    10. Bake for 50 to 60 minutes, or until a toothpick inserted into the center of the loaf comes out clean. Remove from oven and cover with a wet paper towel for 10 minutes.


    Note: It's very important to not overprocess the cream cheese filling. If you do, it will liquefy and will be absorbed into the batter. This won't ruin your banana bread, but you won't see the cream cheese layer.

    Enjoy! If you take any pictures I'd love to see!

    Sunday, July 31, 2011

    Outrageous Chocolate Chip Cookies

    Outrageous Chocolate Chip Cookies

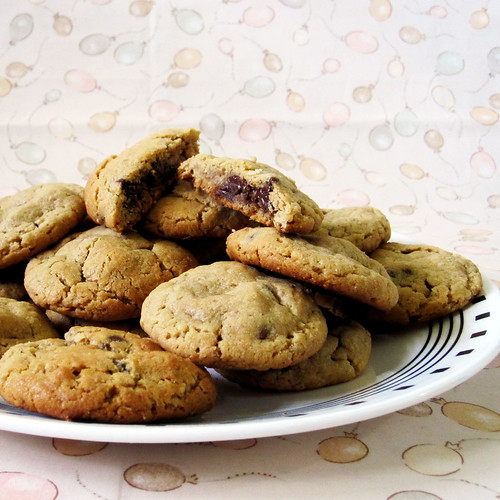
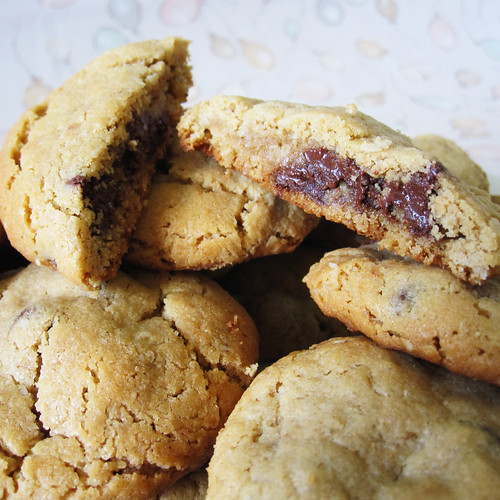
       I don't know if this belongs in a crafty blog, but these cookies were so good I had to write about them in a post of their own. We made these following this recipe and I don't regret not changing anything from it. They have chocolate chips, peanut butter, oatmeal and brown sugar. They were made 2 days ago and they are still soft and delicious. If you think you should make this, stop thinking about it and go make yourself some yummy cookies.

    Outrageous Chocolate Chip Cookies
    Related Posts Plugin for WordPress, Blogger...
    Related Posts Plugin for WordPress, Blogger...